 Skip to content
A lovely lazy weekend recipe to try, this easy sourdough bread only requires a few minutes here and there to end up with a beautiful loaf of bread. An easy way to dip your toe into the world of sourdough.
Please note that this page contains affiliate links. While we only recommend products that we believe in, we may benefit financially from any purchases you make.

We LOVE sourdough here on our little homestead.
However…..
It has taken some time to perfect the good ole sourdough loaf, I can tell you.
New year, New loaf??
I decided enough was enough. In January this year, I embarked on a mission to master the artisan round sourdough loaf. I have a great everyday yeasted recipe we use for sandwich bread, but it was the crusty sourdough loaf I wanted to create.
I found a recipe online, and set out to bake bread!
Well.. every day I fed my starter. Everyday, I made dough. Everyday I baked a loaf. Some days were great! Victory!
Other days the dough was too sticky. Or it was still raw in the middle. Or I burnt it. Like this…
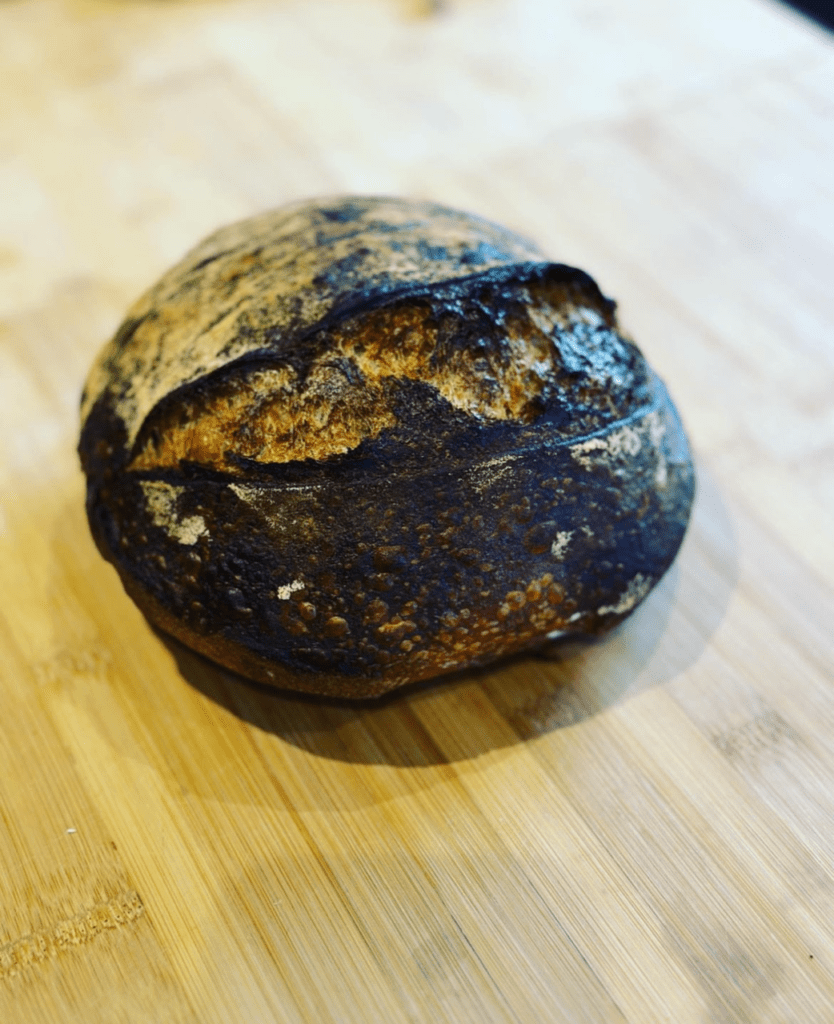
I mean, we still ate it! Not really a mastered skill though at that point…
Enter the Easy Sourdough Recipe
I have a few sourdough go-to people, but hands down my favourite is Lisa at Farmhouse on Boone. She has so many great recipes but her easy beginner’s sourdough bread recipe changed it all for me.
I was on the verge of giving up, when my husband suggested trying one more variation, one more recipe. He knows me so well, when to encourage me. So I did what I should have done from the beginning, and went to my trusted source!
Instant success!
I’ve adjusted the recipe slightly to suit our family, but this recipe works EVERY time!
Even if you’ve never made sourdough before, give this recipe a try, and you’ll wonder why you waited!
If you would like to make a sourdough starter from scratch, try our easy tutorial here
The Benefits of Sourdough
It can seem quite an effort to make, maintain a starter and bake sourdough, so what is all the fuss about?
- Sourdough is a form of leaven which cause bread products to rise, similar to the instant yeast you can buy. Sourdough yeasts are caught from the air however, along with beneficial bacteria and so create a very local and unique living organism.
- Sourdough has a long fermentation process compared to the hour or so it takes for bakers yeast to work. This means that the enzymes and bacteria have a long time to digest and process the sugars and gluten present in the flour, leading to easier digestion, compared to regular bread.
- For this reason, people with mild gluten intolerances can sometimes eat sourdough with less problems. (This is obviously not the case for people who have Coeliac’s disease or gluten allergies)
- The sourdough fermentation process means the vitamins and minerals in the end product are much easier for the body to access and utilise, meaning that long fermented Sourdough bread is better for you than normal bread.
- It also tastes REALLY good. So that’s a bonus!
Lets make this Easy Sourdough Bread Recipe
What You’ll Need:
Glass bowl
Kitchen Scales
Measuring spoons – These are my favourites
Dutch Oven – this is mine
Sharp knife or Bread Lame
Optional extras – Dough whisk, Bread banneton, Bread sling ( these are not necessary to bake the odd loaf, but helpful tools when making sourdough regularly.)
Ingredients:
Fed and active Sourdough Starter – (Learn how to make one here)
Strong white organic bread flour
Organic Wholewheat flour
Warm water
Good quality salt
Method:
- Starter care: 8-12 hrs before, feed your sourdough starter and leave somewhere warm until at least doubled in size. You can test if the starter is ready by placing a small amount in some water. If it floats, and is full of bubbles, you can bake with it.
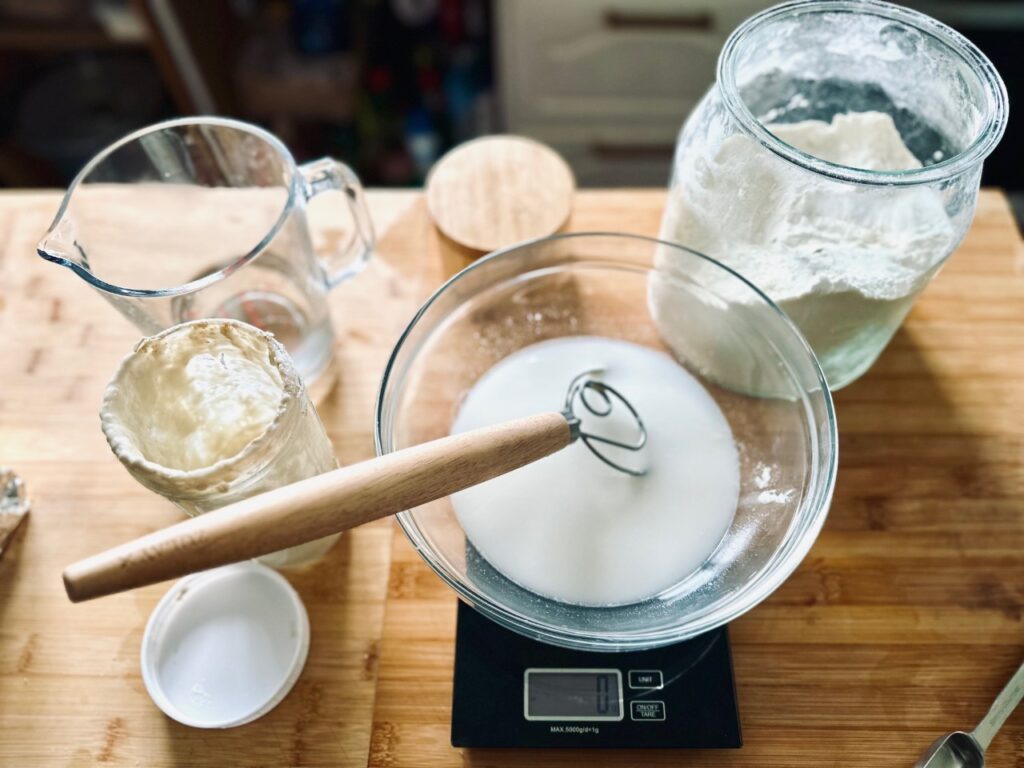
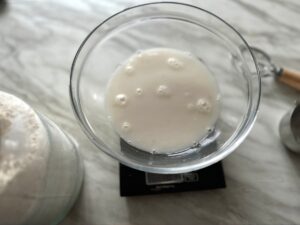
- Place the water and starter in a glass bowl (any yeasted, or living product should be made in glass bowls as metal can affect the living organisms)
- Mix until the starter has dissolved.
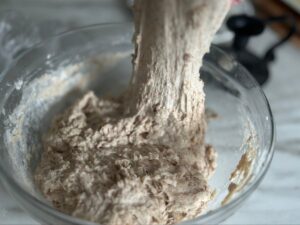
- Add all of the other ingredients and mix

- The dough will be quite shaggy at this point, so we now leave it covered for 30 mins for the flour to absorb all of the water and become more pliable (this is called Autolyse)
- The next step is to begin a series of stretch and folds, to gently work the gluten in the dough. It is as simple as it sounds. You take one side of the dough and stretch it upwards (it is best to do this with wet hands)
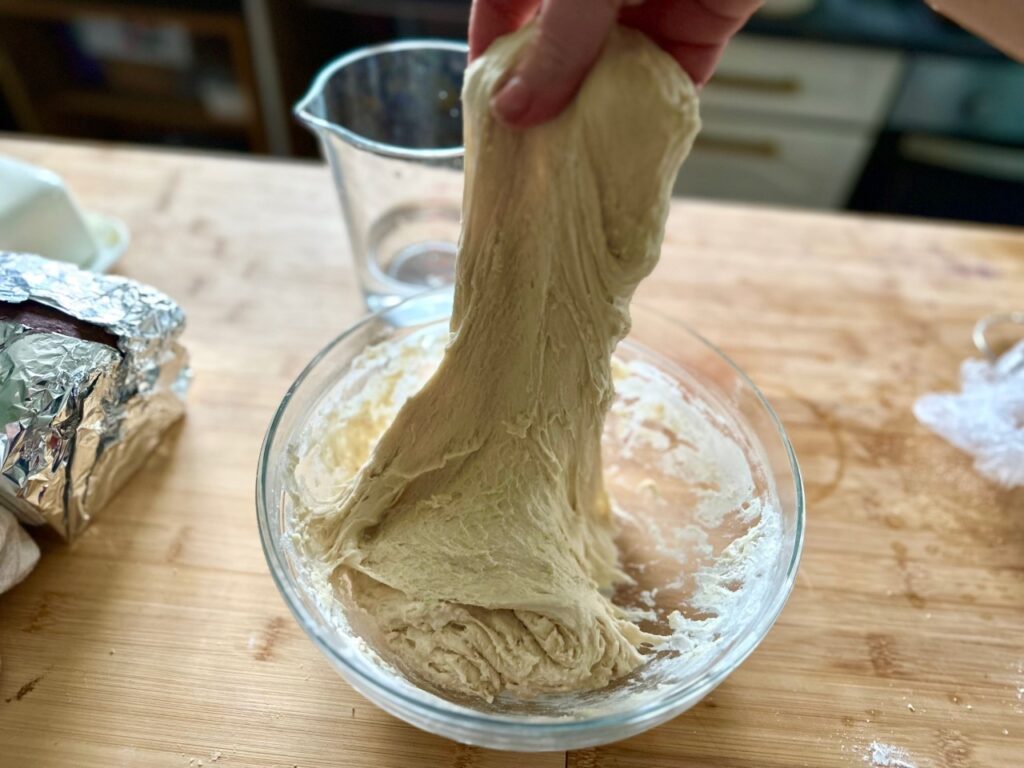
- Then fold it over the dough
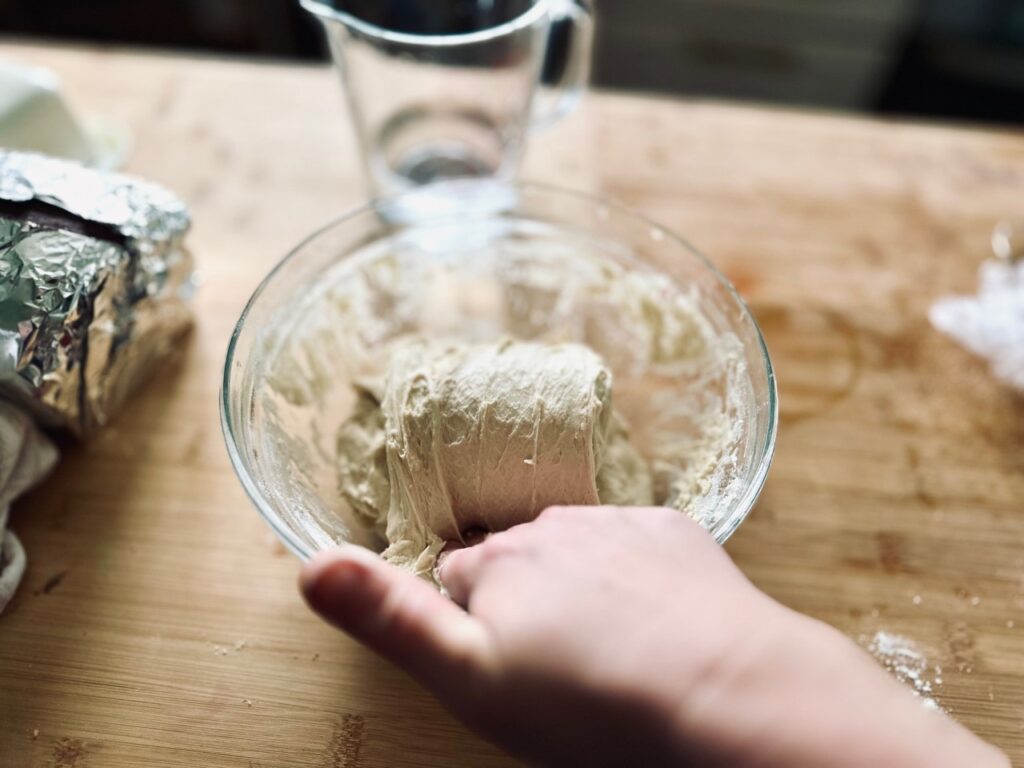
- Turn the bowl a quarter turn and stretch and fold again, until all four sides of the dough have been stretched. Cover and leave for 30 mins.
- Repeat the stretch and fold technique twice more, with 30 mins resting time between. This is the slow gentle version of kneading regular dough.
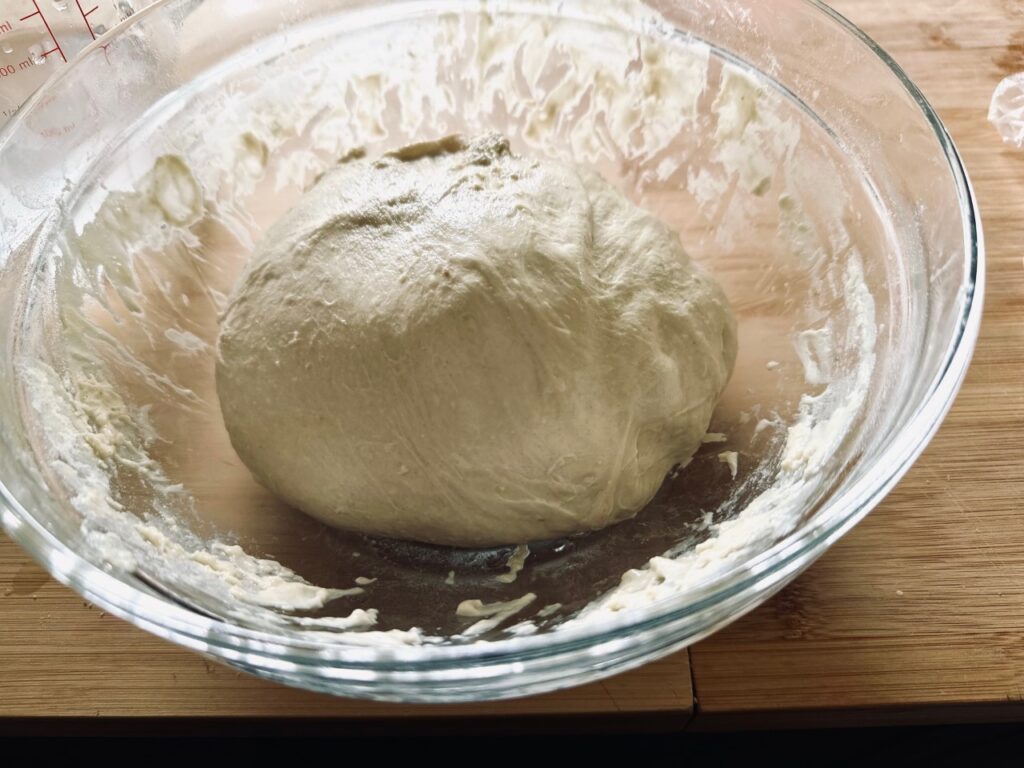
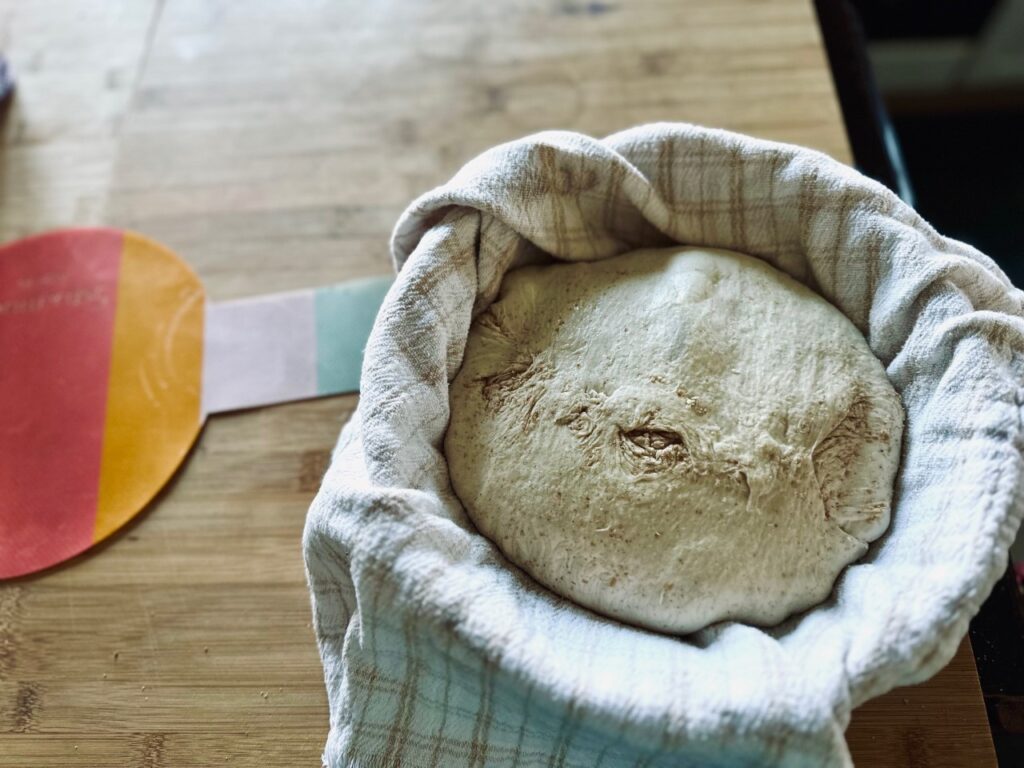
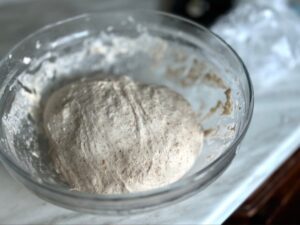
- After the last set of stretch and folds, cover and leave for the bulk fermentation. Place the dough somewhere warm for 4-7 hrs, until doubled in size
Here is mine after the last stretch and fold
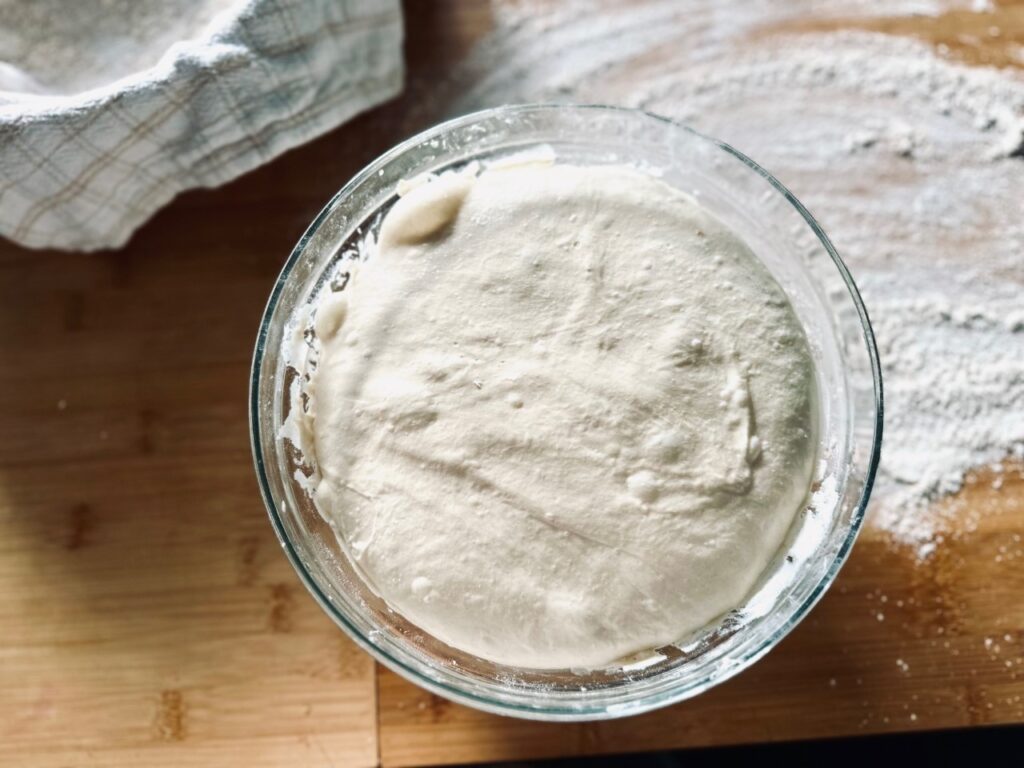
And here is mine after 8 hrs on the kitchen side.
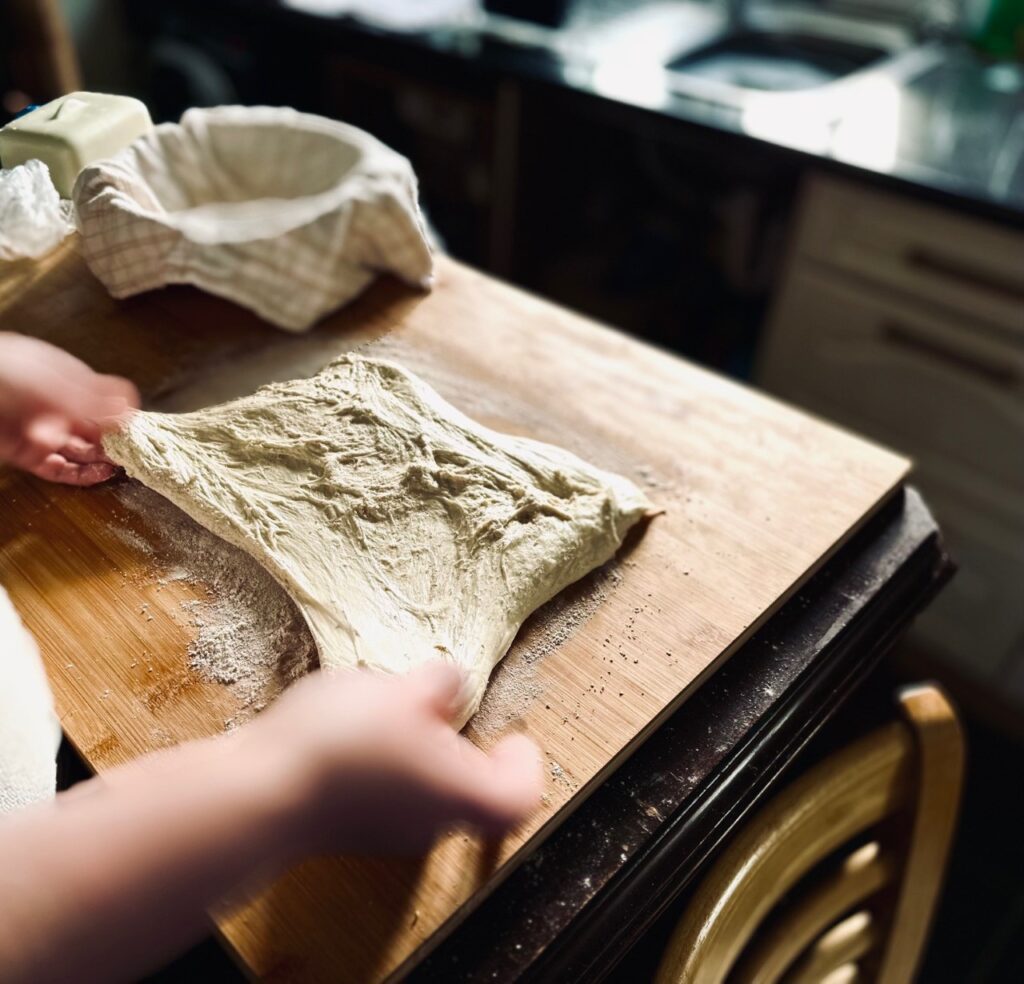
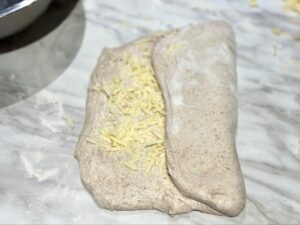
- Now we need to shape the dough. Firstly, flour the surface well. next gently pull the dough into a flat rectangle like this:
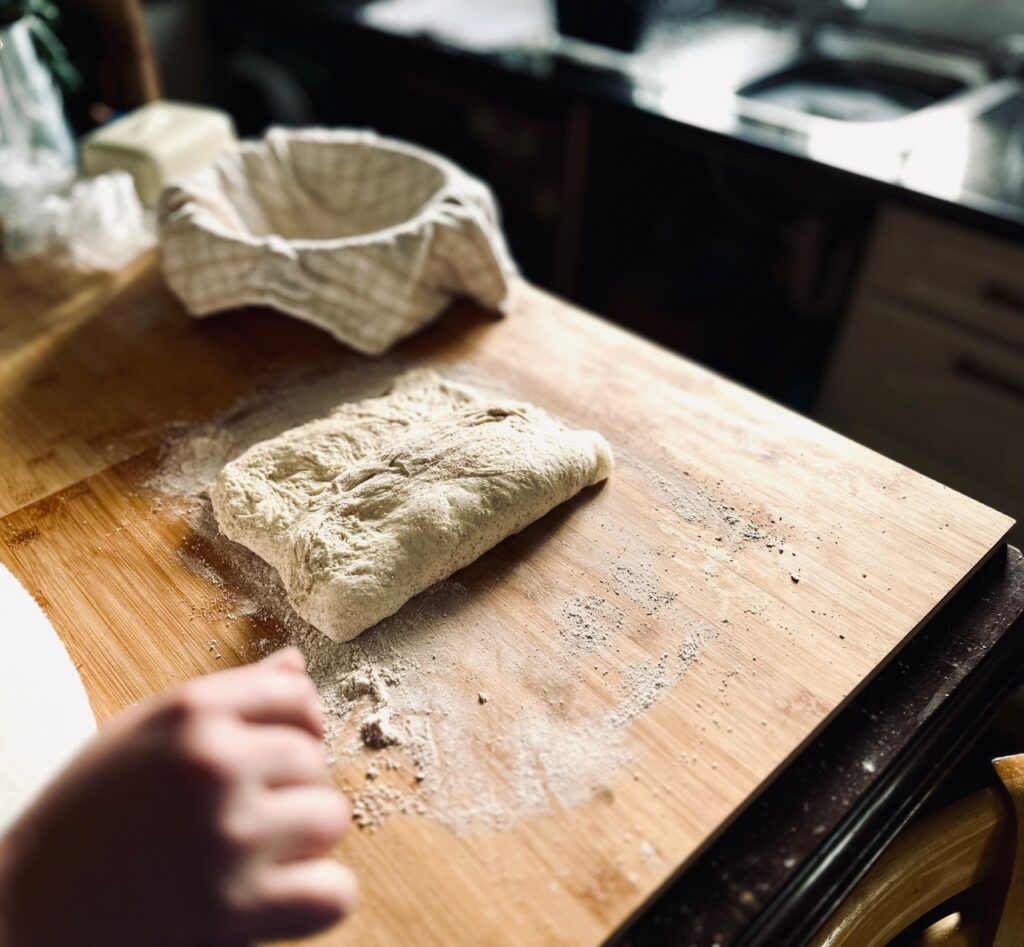
- Next, fold each end in on itself to make a long log shape
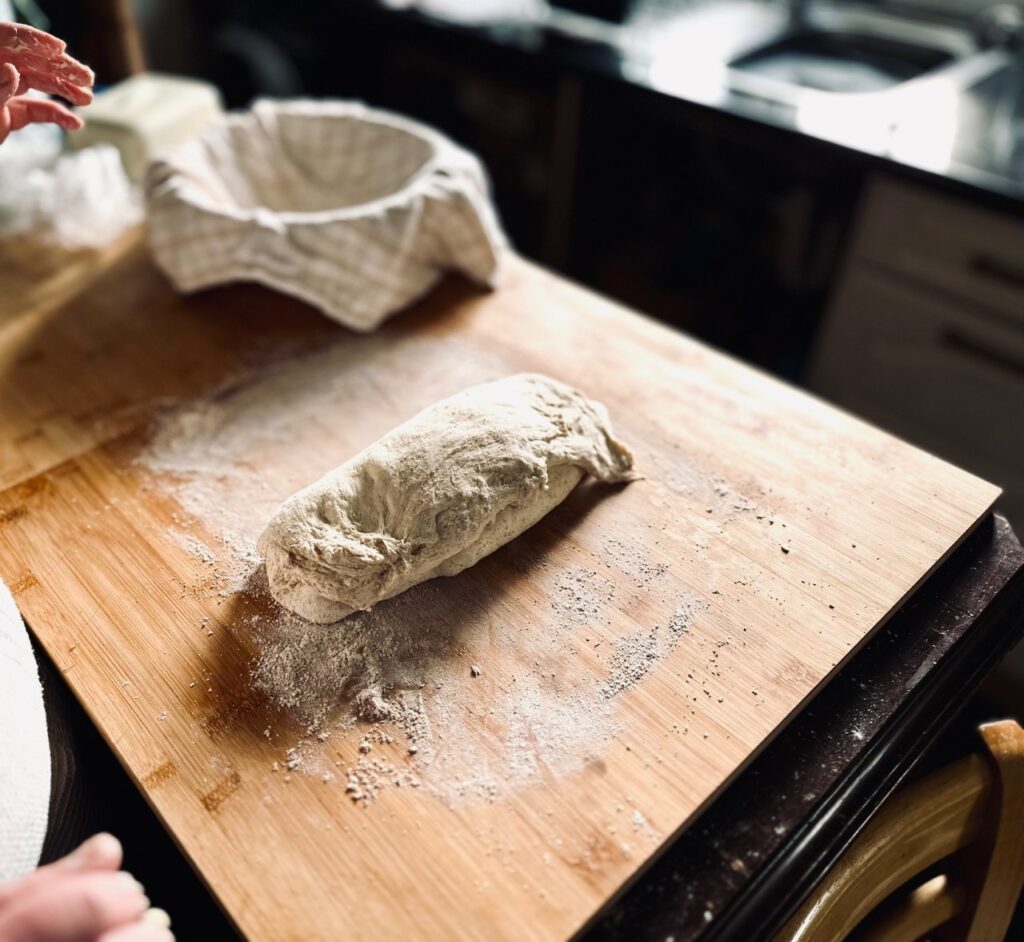
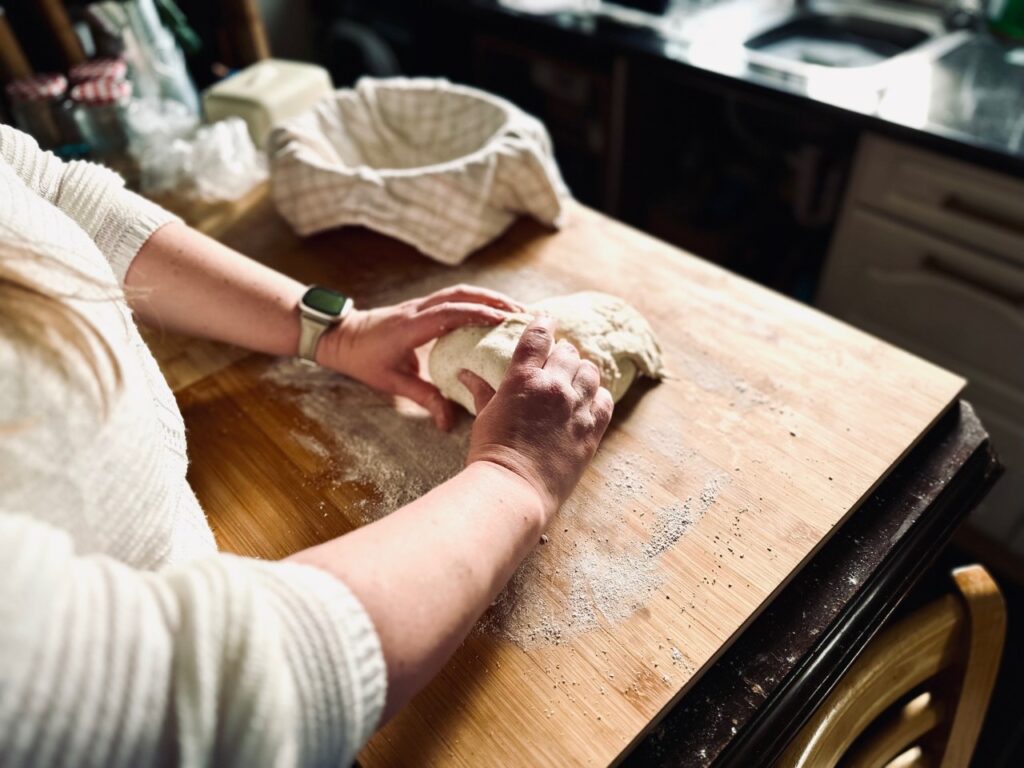
- Then we roll from one end to form a ball, all the time trying to create a nice surface tension on the dough.
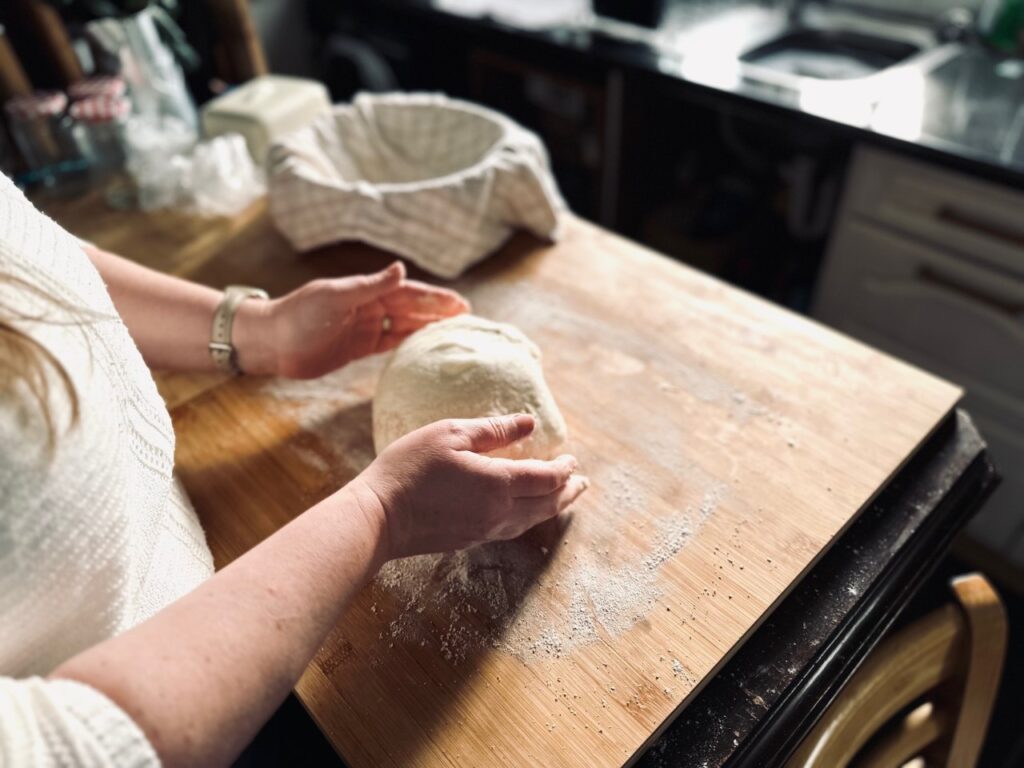
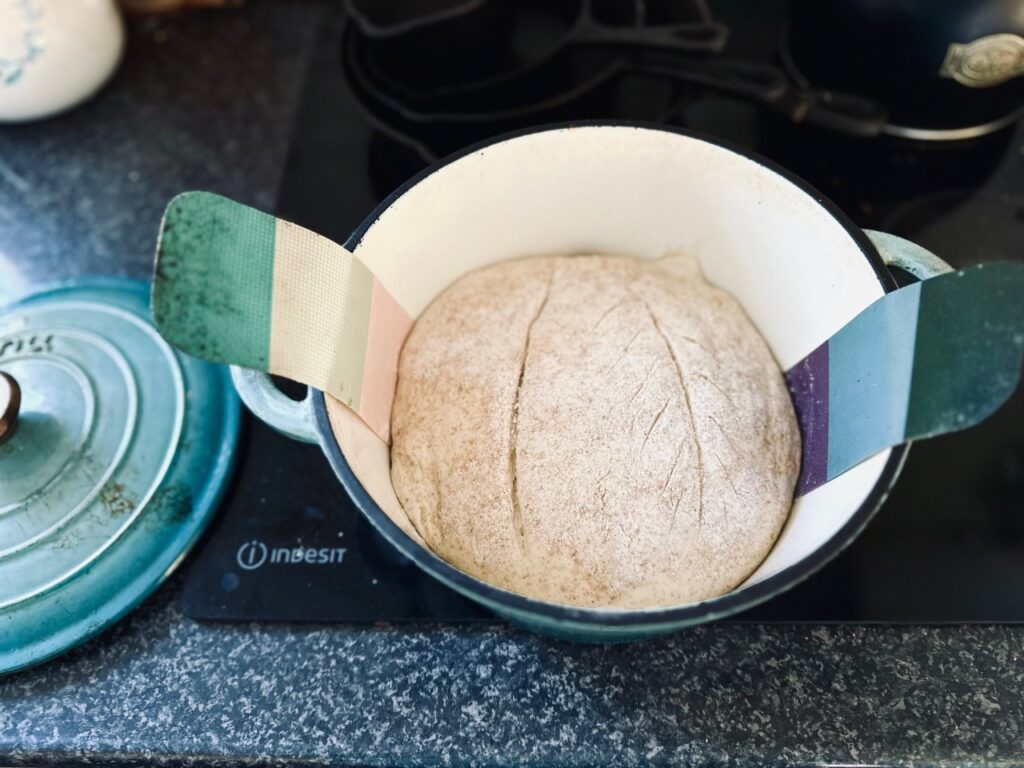
- Once the ball of dough is firm and shaped, transfer upside down to a banneton basket or a bowl lined with a tea towel, and cover with a plastic bag or in my case, a plastic shower cap! ( I was gifted a big bag of them last year and I reuse them until they break as they’re perfect for this very thing! Trying to live sustainably, even though it’s plastic…)
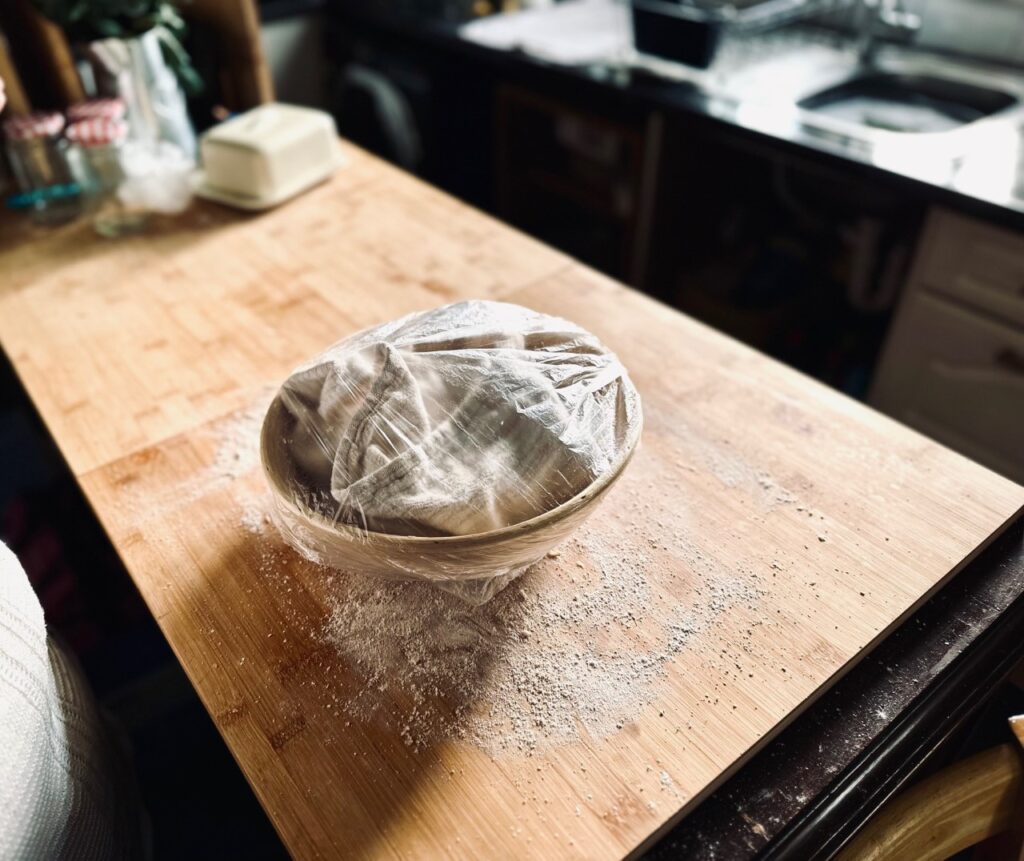
- Once covered, place in the fridge for 12-24 hrs (I do this overnight, ready to bake in the morning)
The next day:
- Place the Dutch oven in the oven and preheat on full power. (250c is as high as my oven goes so I use that)
- While the oven preheats, take the dough out of the fridge. If not using a bread sling, take some baking paper, and screw it up. (cooking hack – this makes it mouldable and fit to your dish. Works for lining baking pans for cakes too) Unravel it ad dust with flour. Turn your dough out onto it.
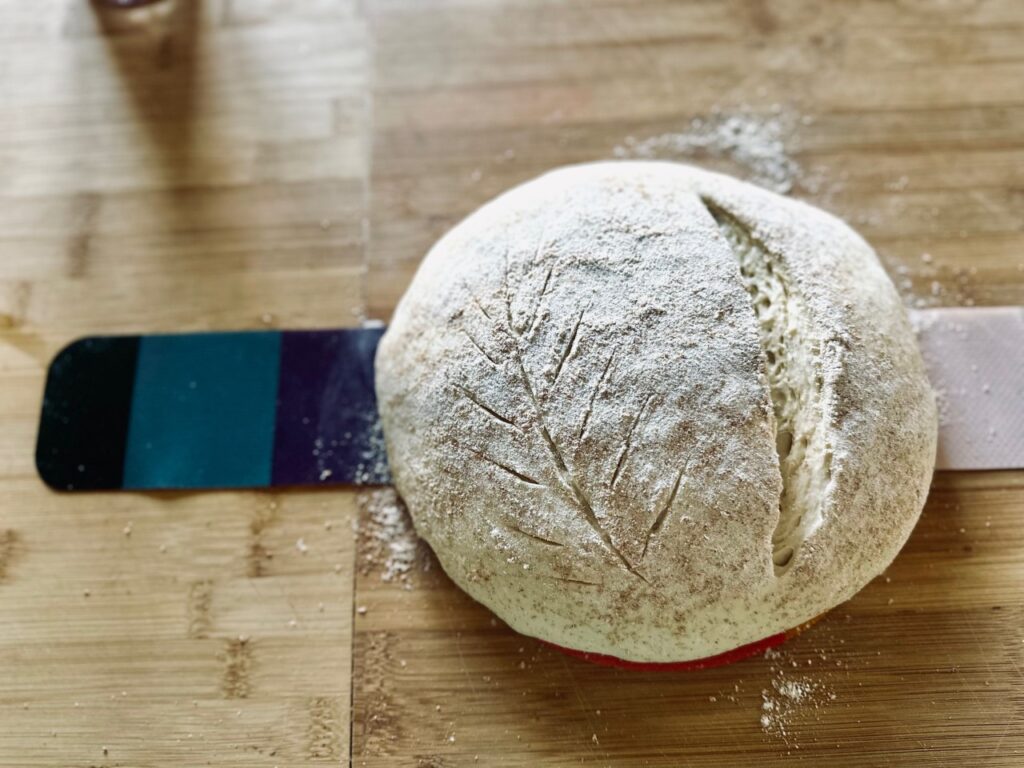
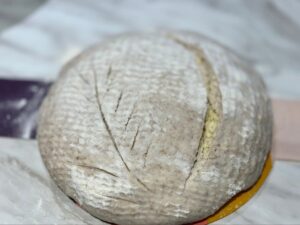
- Using a sharp knife of a bread Lame, make a big slash in the dough. I know, this doesn’t feel right, but it tells the bread where to rise when it’s in the oven. You can make a pretty pattern on the other side, I’m sure you’ve seen the Pinterest worthy loaves of beautifully scored bread. I’m still working on the pretty bit..
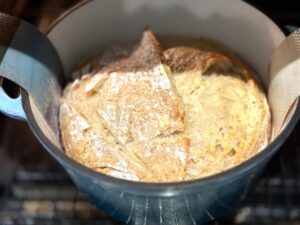
- Use the paper or bread sling to transfer the dough to the Dutch oven. Place a small cube of ice into the Dutch oven just before you transfer the dough, to create steam in the pot, this helps the dough to rise.
- Quickly place on the lid and bake on full heat for 25 mins.
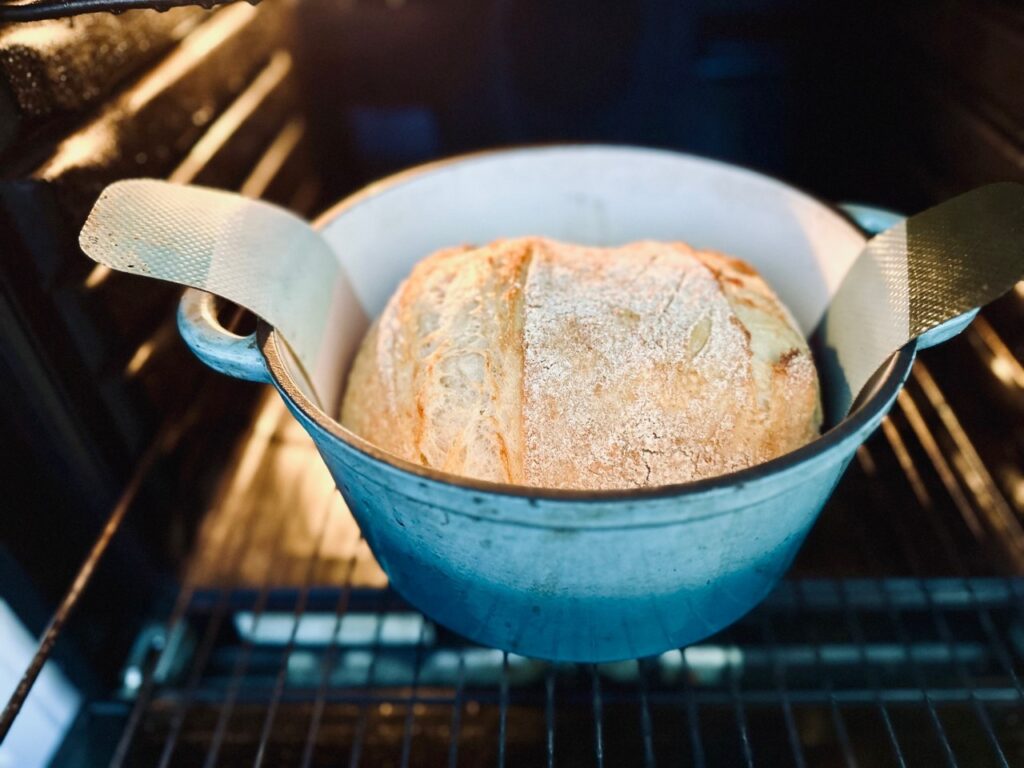
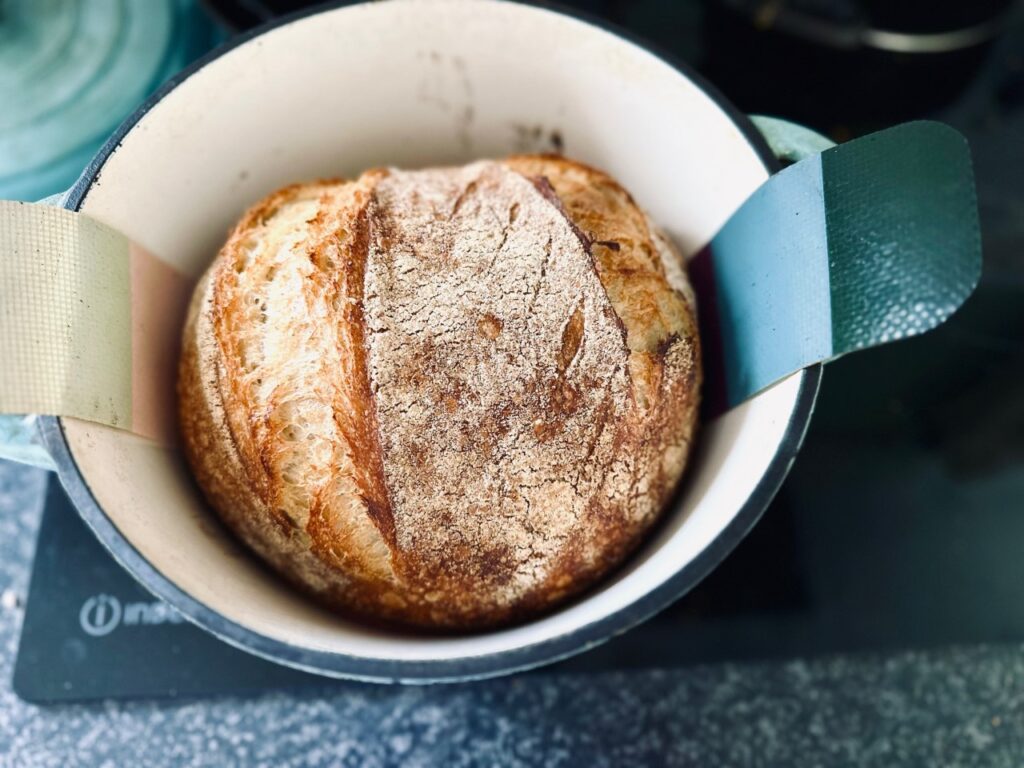
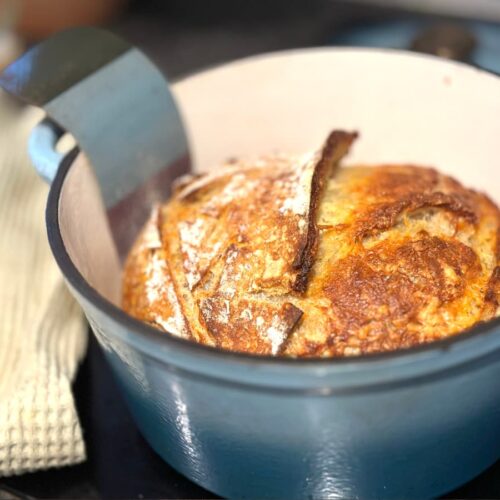
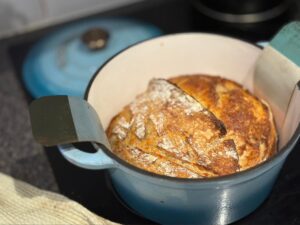
- After this time, remove the lid and carry on baking until golden brown ( look at how much it’s risen after 25 mins!! Makes me so happy)

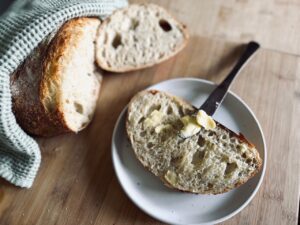
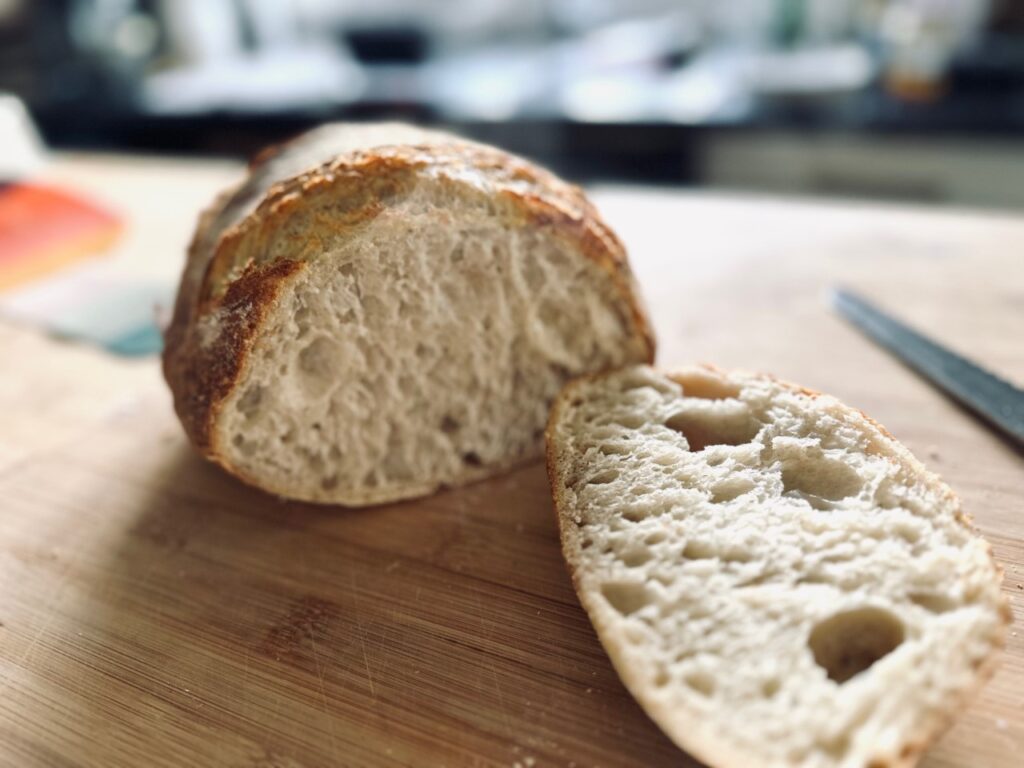
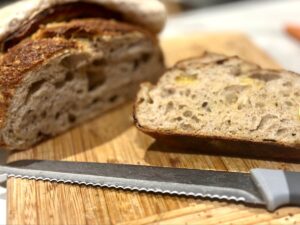
If you possibly can, allow it to cool before slicing, as the gluten will settle and be less gummy. other than that, enjoy your freshly made loaf of delicious sourdough bread!
As I mentioned above, there are so many bread gadgets you can use, but if you’re just starting out, you don’t need all of that. Try it, as you get to know your flour and your starter and how it’s supposed to look, you’ll gain more confidence in your skills. Happy baking!!
Tell me your worst sourdough fails in the comments! And don’t forget, if you liked this recipe, please share it! Thanks friends x
Cheddar Sourdough Bread Recipe
Equipment
- Glass bowl
- Kitchen Scales
- Measuring spoons
- Dutch Oven
- Knife or Bread Lame
Ingredients
- 350 g Warm Water
- 100 g Active bubbly sourdough starter
- 375 g Strong white bread flour
- 100 g Wholemeal flour
- 10 g Salt
- 200 g Grated cheddar
Instructions
- Day 1 PM – Feed starter 4-12 hrs before using, so it is bubbly and doubled in size. To test if your starter is ready to use, place a spoonful into some water and if it floats, it's ready.
- Day 2 AM – Place the starter in the water and mix until milky. Add the rest of the ingredients and mix into a shaggy dough.
- Cover and leave for 30 mins to Autolyse
- Stretch and fold – After 30 mins, wet hands and take hold of one side of the dough and stretch upwards before folding over onto the ball of dough. Turn the bowl a quarter turn and repeat until all 4 sides have been folded over. Cover and leave for 30 mins. Repeat 2 more times.
- After 3 set of stretch and folds, cover and leave somewhere warm for a bulk ferment of 4-8hrs, until doubled in size.
- Shaping – Once doubled, turn onto a well floured surface and gently stretch into a flat rectangle. Add the cheddar to the top and press in gently. Fold one end into the middle, then the other, forming a roll. Add any remaining cheddar to the top before you roll up. Take the end of the roll and roll that up, making a tight ball of dough. Roll the ball lightly forwards and backwards to create tension in the dough (see pics above)Place the dough face down into a lined bowl or banneton basket, cover and place in the fridge overnight (12-24 hrs)
- Day 3 AM – Place a Dutch oven into the oven and preheat to 250c
- Take the dough from the fridge and place onto floured parchment paper or a bread sling
- Using a sharp knife or lame, slash a deep cut in the bread to tell it where to expand, and score a pretty pattern lightly in the dough if desired.
- Remove lid from Dutch oven (carefully!), and then use the parchment paper to lift and place dough into it, place on the lid and bake for 25 mins
- After 25 mins, remove the lid, turn down the temp to 180c and bake for a further 20-25 mins, until golden brown.
- Remove and cool, slice and enjoy!

2 thoughts on “Easy Sourdough Bread Recipe”